
Frontend Development on Steroids: From localhost to environment, without a deploy!
Everybody knows that tackling hot-patch fixes on Production environments is not an easy task. Especially when multiple teams are working on it, and you’re not the only one. Multiple deployments are not a possibility and you’re asking yourself “how could I even test if my fix did work?”
Well, I know. I can read your minds “hey, what’s wrong with you?! Don’t you have a local environment?”. Sure, I have it. But sometimes is not enough, especially when you are depending on services that, because of security reasons, double check from which domain the action is called.
So, again: how can I find a way to inject my code inside of it, by just replacing maybe the CSS and JS code, in order to test my actual fix?
The methodology
Googling a little bit, I found this awesome Chrome extension which is just one, in a plethora of choices. But I liked the approach to have a custom local-hosted Option page, and I went for it.
Preconditions
Where do go then from here? Well, the steps are pretty much easy.
- First, you need to make sure that your builds are Reproducible
- Second, you need to provide an HTTP server, in your computer ( via localhost ) or either a third party server ( remember to provide HTTPS urls, most probably your official environment is already using it )
- We need to map URLs and refresh the page :)
For the sake of demonstration, I will use http://dev/ as URL path, where
devis my current VM where I store everything related to development.
Simple HTTPS localhost-server
You all know that I am a Node fan. And because of this I’m actually using a really simple solution based on gulp-serve.
To make it run be sure you create a folder structure like this one:
SimpleHTTPServer
|- public/
|- gulpfile.json
|- package.json
and inside of SimpleHTTPServer just run:
npm i --save gulp gulp-serve
afterwards, inside gulpfile.js copy-paste this example:
var gulp = require('gulp');
var serve = require('gulp-serve');

gulp.task('default', serve({
  root: ['public'],
  port: 443,
  https: true,
  hostname: '0.0.0.0',
  middleware: function(req, res) {
    // custom optional middleware
  }
}));
and finally run sudo gulp command. You should be up and running with your simple http server ( just go to https://dev ).
Mapping URLs
Of course before mapping a URL we should know which one to tackle. For the sake of demonstration I just loaded a random article from The Next Web, in order to show to you that you can actually run this for real.
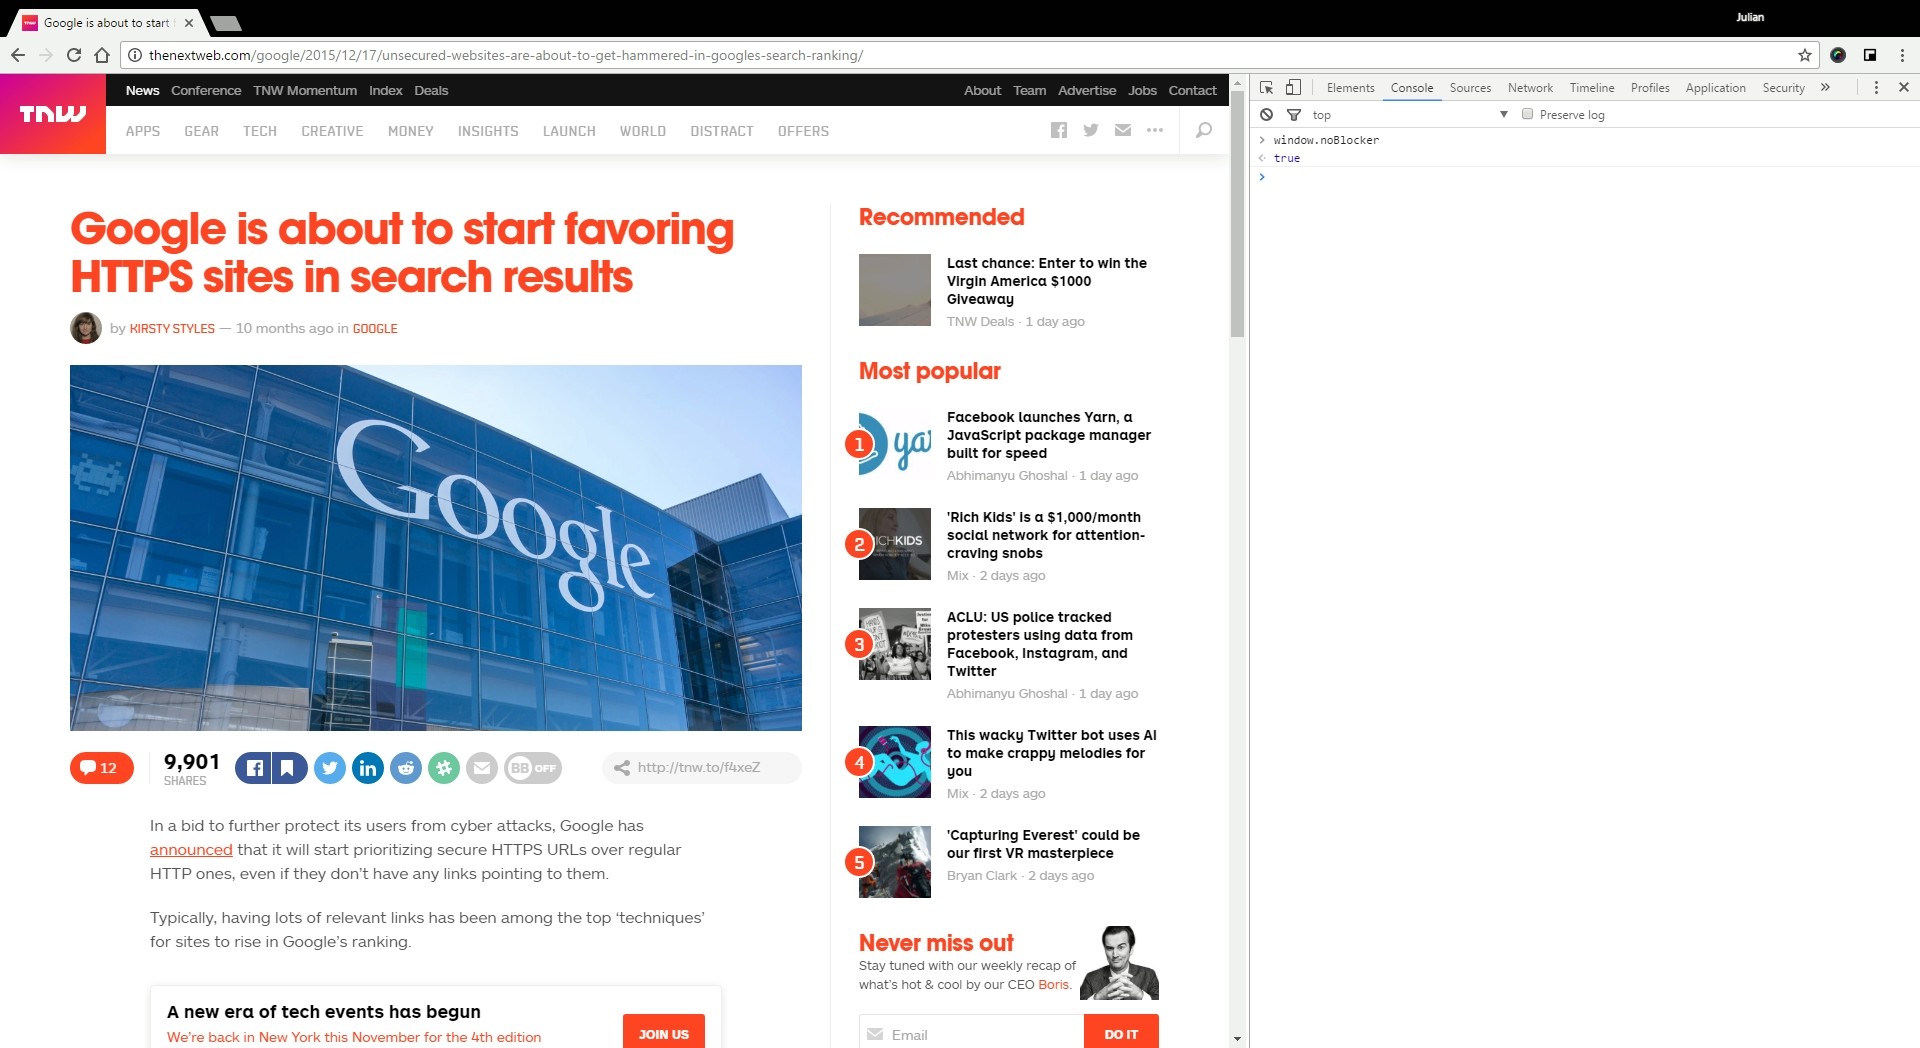
For this special usecase, we decided to tackle this simple JS file: http://thenextweb.com/wp-content/advertisement.js
As you may see from the file, the window.noBlocker property is set to true in my case. Well, let’s try to fool it by setting it to false.
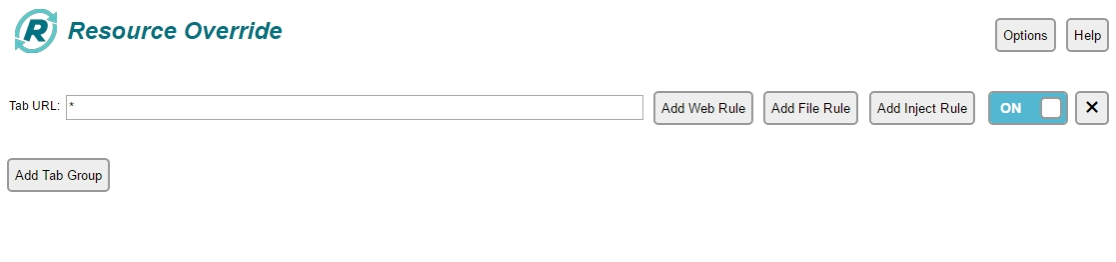
To map the URLs on the page you want to tackle, first load it on a generic tab, after you’ve installed the extension, then press F12. This will open Developer Tools, where inside you can find the Overrides tab.
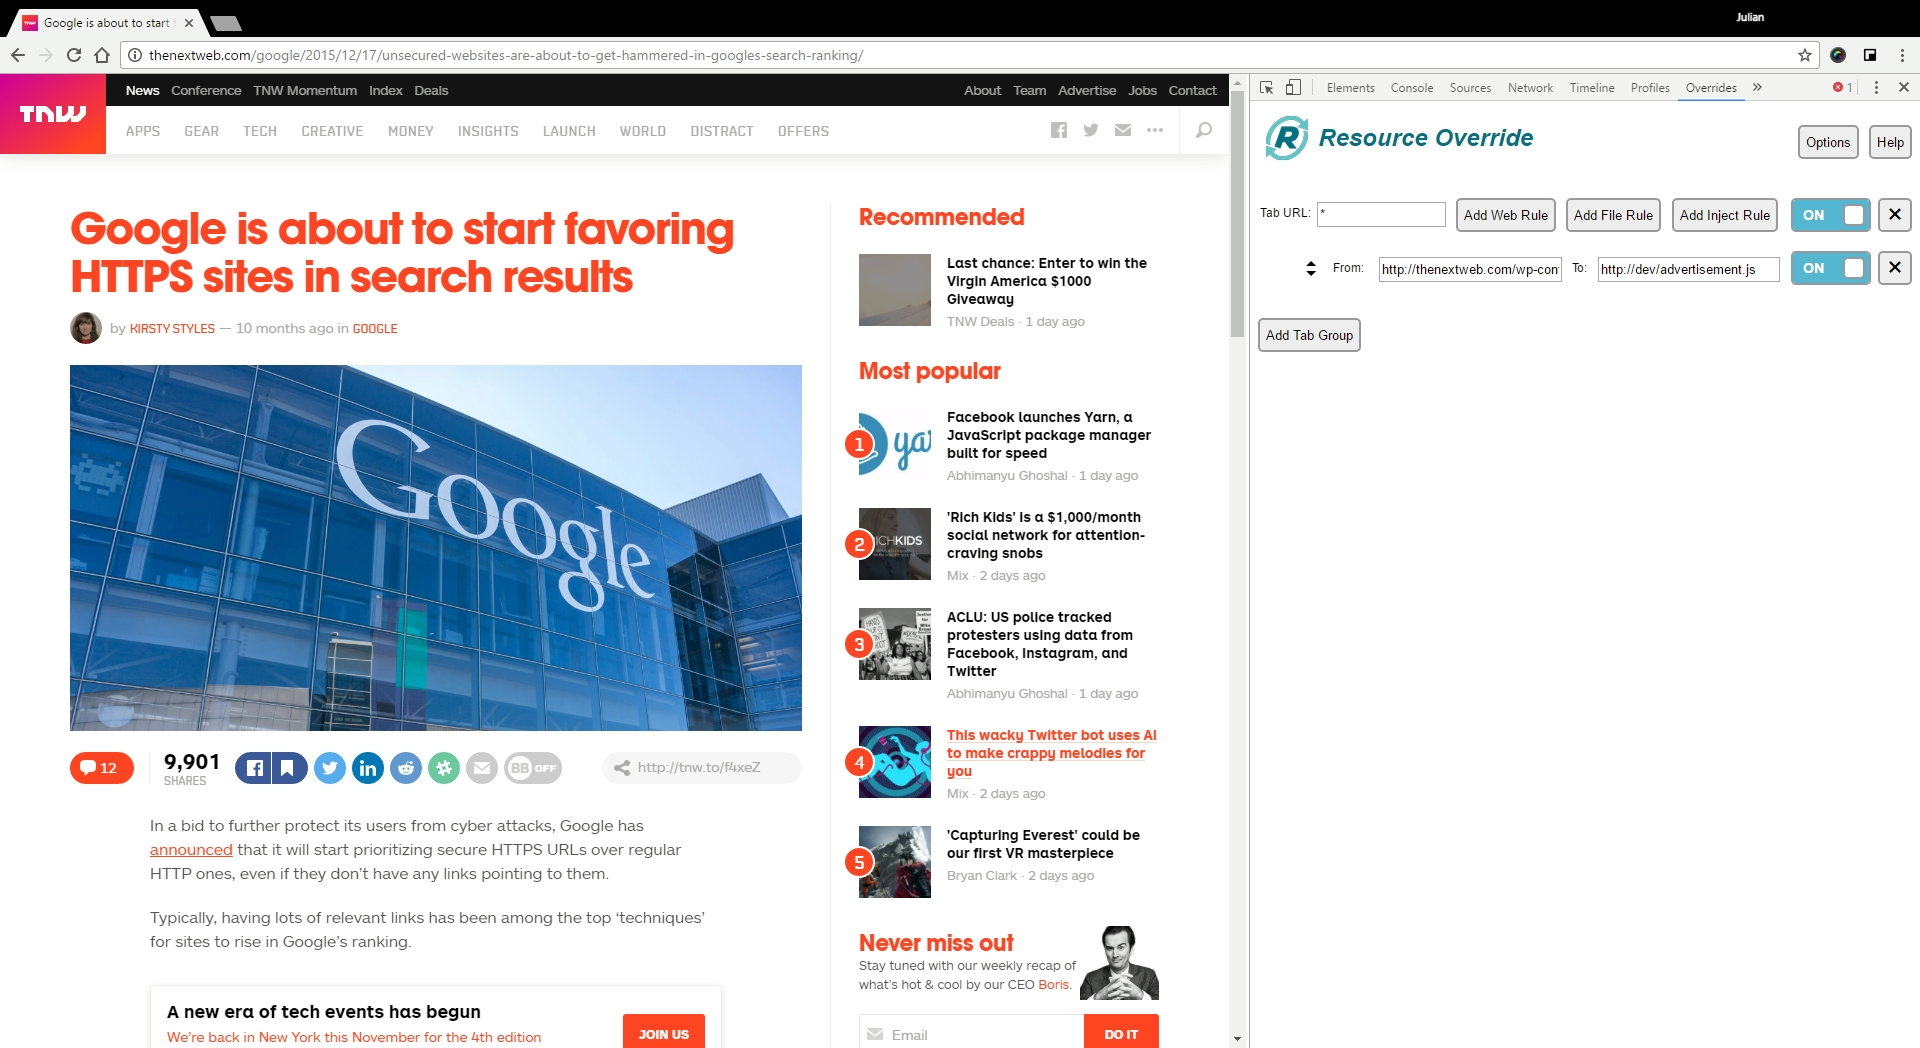
Afterwards, type the URL you want to replace, with the URL where you are hosting your current Javascript ( in my case, http://dev/advertisement.js ). Inside this file what I pasted inside was just this:
window['noBlocker'] = false; // Nice try :)
Now, it’s time to refresh our page and to test if it worked. We can actually see that it worked straightforward :D

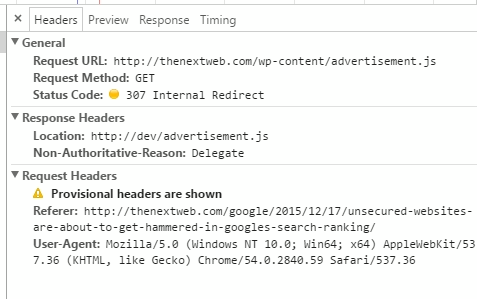
How this was reached technically behind the scenes? Simple: the extension is forcing redirection of URLs, as you can see.
Conclusions
Awesome right? :) Well, this actually made my day. Just now consider if you could replace your minified and compressed javascript, with the opened one, maybe with all the names in place and lines of the code identical to your source, wouldn’t it be awesome?
Sure it is! And you can totally accomplish this today using this method :) Said that, remember to use Chrome Dev Tools to Debug your code and to verify where it fails.
Happy bug-fixing and Development :)